
Tips On Taking Great Indoor iPhone Photos Of Your Kids

Whether you’re sheltering in place or capturing photos for holidays, birthdays or other milestones, your home is always prime for documenting photos of your kids. You may not have a professional DSLR camera, but chances are your iPhone — which touts a pretty amazing camera — will capture some pretty amazing images.
First, it’s important to understand that GOOD light is EVERYTHING.
One of the biggest missteps in taking good photos is focusing on the background first. If you notice your iPhone photos look blurry, orange or generally “meh”, it’s because you probably aren’t photographing in great light. Even on a cloudy day, you can get beautiful natural light to take great photos. So make sure you’re getting good light first and background scene second.
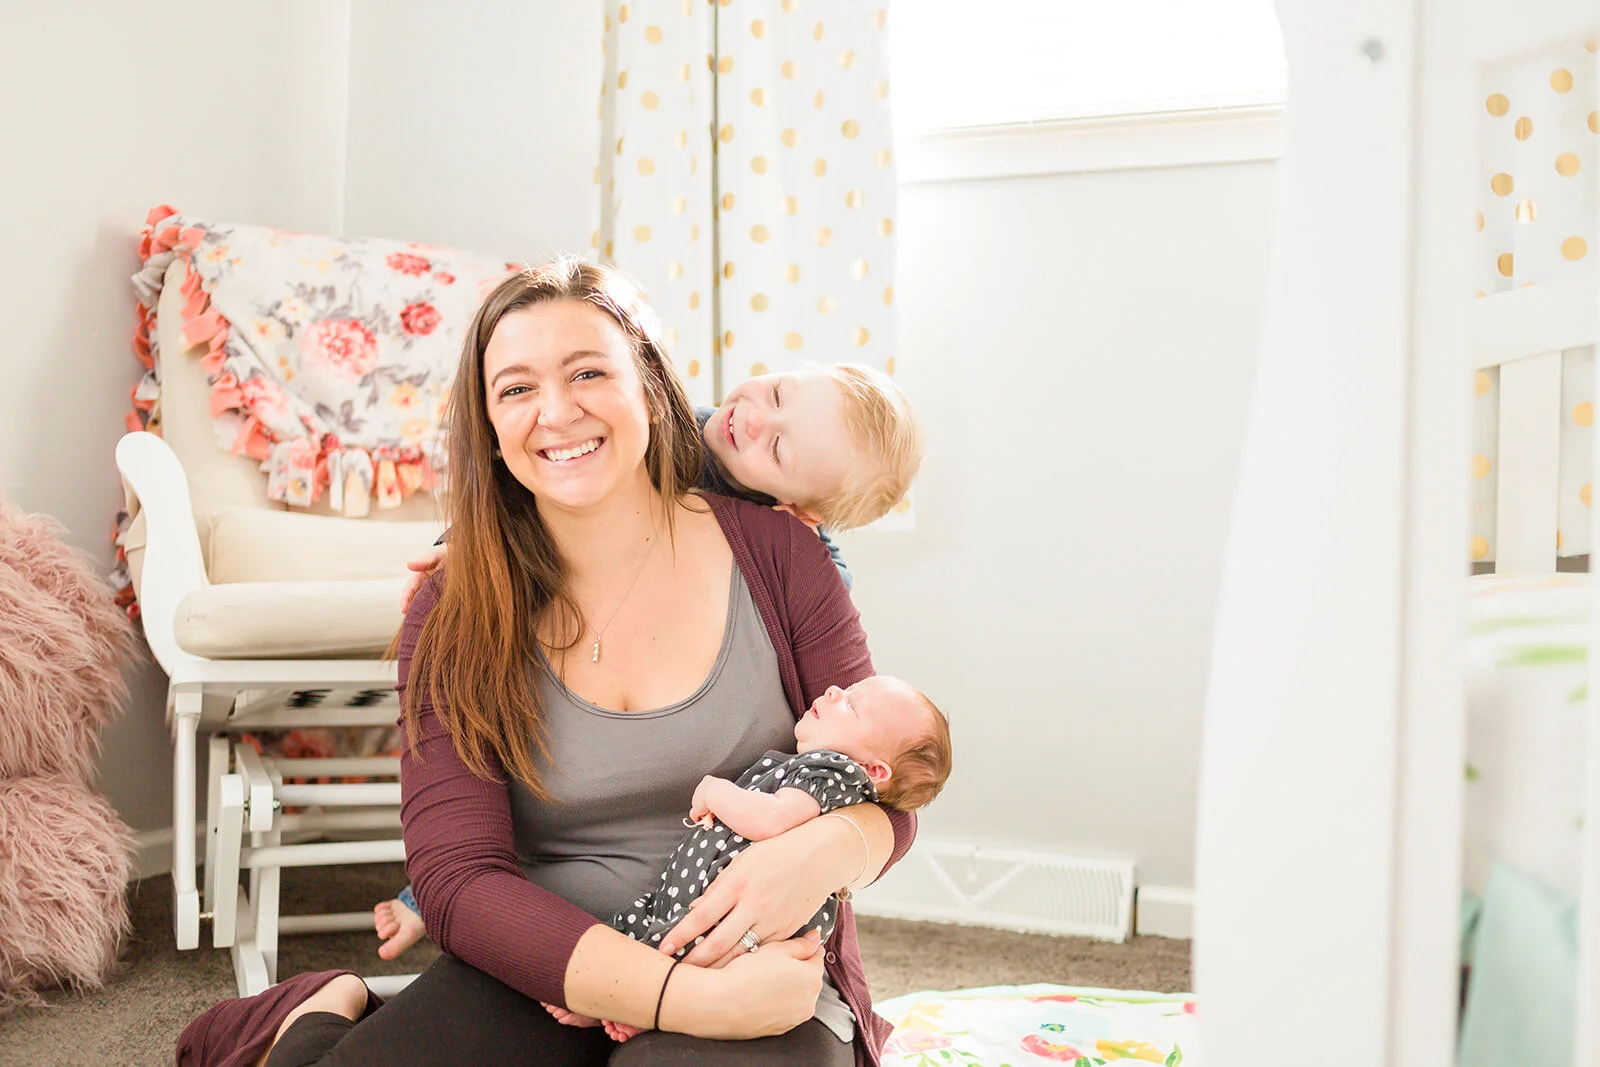
Find the brightest room in your home. Typically, a living room works well, or rooms with lighter wall colors and ample window light. Ideally you’ll get a brighter scene without a harsh, direct light spilling in the windows.
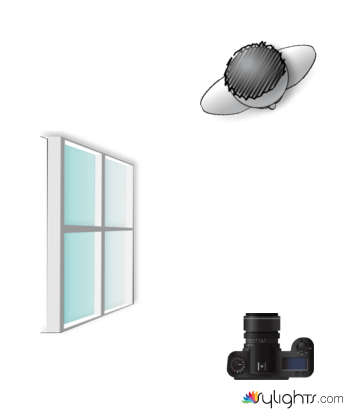
Photo Credit: Digital Photography School
Use Window Light.
Photograph your kids tucked just behind and perpendicular to a window to get the prettiest, natural light. (See the diagram above.) Light near a window creates an easy, natural look for your images. The best time of the day to photograph indoors is usually between 10 am and 4 pm, depending on the time of year.
If you notice your photos have an orange tint, it’s because you don’t have enough light. Or, your camera is adjusting the image’s color tone based on available light in your home, and incandescent lights will cast a warm (yellow) color hue. Try photographing midday, with the lights off.
If a face looks blown out, you need to add more distance between your kiddos and the window light. Experiment, move around where your kids are playing and see which photos look best. It takes time, but you’ll eventually have a trained eye.

Example of before/after backlit photo. Photo credit: Digital Photo Mentor
Avoid BAcklighting.
Translation: Avoid photographing your kids with the window directly behind them, while you face your camera phone directly toward the window. Have you noticed photos that are backlit — when the main source of light is behind your subject — make whoever you’re photographing very, very dark? Your camera adjusts the exposure of your photo based on how much light comes into its sensor.
Similar to the pupil in the human eye, your camera’s sensor thinks there’s more than enough light based on the total scene it’s taking in. As frustrating as it is, without a powerful flash, there’s no perfect way to work around a backlit scene with an iPhone. We get around this as professionals by adding light with a flash, strobe or bouncing light into a subject’s face with a rather large reflector.
Because your camera will under-expose the subject for a backlit scene, you’ll need to avoid this or use a powerful flash to fill your subject’s face. If you can’t avoid a backlit shot, try holding up a white poster board to use an inexpensive way to get fill light.
How to Find Good Light: Raise Your Hand!
It’s also important to watch for bright hot spots and dark, heavy shadows. You can raise you hand to the area where you plan to position your kids and take a photo of where his/her head would be.
If the photo of your hand looks blown out (too bright), move around and find a spot where the light looks softer, but where the shadows aren’t too harsh (you’ll see a cast where your knuckles are). The opposite holds true for knuckles.
Experiment! It takes some time for most of us pros to quickly identify good light well.
Get a clean Scene.
So I harped on the fact that good light ALWAYS comes first, but a messy background can also distract from a good photo. You don’t want your room to look overly sterile but tidying up a space can remove distractions that cause the eye to pull toward areas of the photo that aren’t focused on your beautiful kiddos.
Want That Blurred Out Background?
That’s one of the main reasons photography can be so gorgeous — a beautiful person in focus with an out-of-focus, magical background makes us ooh and ahh.
One request, iPhone users: Please don’t go overboard on the iPhone portrait mode. Because the natural curvature of a glass lens creates background blur out in a methodical way, it’s really easy to spot a fake portrait “bokeh” from a professional one. And when used too frequently, the portrait mode starts to feel overly contrived — like a bad Photoshop job.
To get a natural blurry background (in portrait mode or not), add more distance between your subject from the background and get close to your subject to create the same effect naturally. Or, use telephoto iPhone mount lenses to get the blurry background you love so much in professional photos.
Let Them Play.
Capturing kids when they’re totally in their element makes for the best memories. I find that the best photos aren’t posed. And not every shot needs to be perfect. Your kids are sweet (most of the time, right?), natural and authentically them. But if you can somehow position them next to window light to score a great shot, even better!
Learn More.
It’s hard to get iPhone selfies of your family, so consider getting a professional shoot to capture the sweet moments and growing kids. To book your family photo session, feel free to contact me for more information.
In the meantime, keep educating yourself with more with visual examples from my friends here at iPhone Photography School.